What Is Paint Correction, Really?
Paint correction stages explained: one-step, two-step, and three-step processes, compounds vs polishes, and how to know when your paint needs it.
Paint correction is one of the most misunderstood terms in detailing. Walk into a shop and ask for "paint correction" and you might get anything from a quick one-step polish to a multi-day process involving several rounds of compounding and polishing. The term covers a wide range of work, and understanding what's actually happening helps you make better decisions — whether you're doing it yourself or paying someone else.
At its core, paint correction means removing defects from your vehicle's clear coat through abrasive processes. Swirl marks, scratches, water spots, oxidation, holograms from bad machine work — these are all clear coat defects, and correcting them means levelling the clear coat so those defects disappear. You're not filling them in. You're cutting them out.
Understanding Your Clear Coat
Modern automotive paint is a multi-layer system. The base coat provides colour. The clear coat sits on top and provides gloss, depth, and UV protection. It's the clear coat you're working on during paint correction, and it's thinner than you'd think — typically 40 to 80 microns on a factory paint job, which is roughly the thickness of a sheet of printer paper.
Every correction removes a tiny amount of that clear coat. That's why you can't just keep correcting paint indefinitely. There's a finite amount of material to work with, and aggressive correction on already-thin paint can burn through to the base coat. A paint thickness gauge takes the guesswork out of this, but even without one, understanding that you're working with a limited resource changes your approach.
Pro tip: If you're buying a used vehicle, ask whether it's been corrected before. Multiple rounds of aggressive correction on factory paint can leave you with dangerously thin clear coat. A paint thickness gauge reading under 80 microns total (primer, base, and clear combined) should make you cautious about further correction.
The Stages of Correction
When detailers talk about stages, they're referring to how many distinct steps of machine polishing are involved, each with different levels of abrasive cut.
One-Step Correction
A one-step uses a single combination of pad and product to both cut and finish the paint. This is the most common type of correction for vehicles with light to moderate swirl marks and minor scratching. A medium-cut polish on a medium pad can remove a surprising amount of defects while leaving a finish that's ready for protection.
Most daily drivers with typical wash-induced swirl marks are good candidates for a one-step. You won't achieve absolute perfection — some deeper scratches and defects will remain — but you'll get the paint looking dramatically better. For a lot of people, that's the right balance between effort and result.
Expect to spend four to six hours on a sedan if you're doing it yourself for the first time. Professionals with experience can move faster, but they're also not learning the feel of the machine on your car.
Two-Step Correction
A two-step starts with a compounding stage using a more aggressive pad and compound to remove heavier defects, followed by a polishing stage to refine the finish and remove the haze or micro-marring left by the compounding step. This is where you start to see genuinely impressive results — heavy swirl marks, moderate scratches, water spot etching, and oxidation can all be addressed.
The compounding stage does the heavy lifting. A quality cutting compound on a firm foam or microfibre cutting pad will level the clear coat around deeper defects, bringing the surface down to match. The polishing stage then refines that newly cut surface to a high gloss.
Two-step correction is appropriate for vehicles with moderate to heavy paint defects. It's also the standard for any vehicle being prepared for a ceramic coating, since coatings lock in whatever's underneath them — defects and all.
Three-Step Correction
A three-step adds an intermediate polishing stage between the heavy compounding and final finishing. This middle step uses a medium compound or polish to further refine the surface before the final finishing polish brings it to full gloss. In practice, three-step corrections are reserved for show cars, vehicles with severely neglected paint, or situations where the clear coat type responds poorly to jumping directly from compound to finishing polish.
Most enthusiasts will never need a three-step. If someone's quoting you for one on a daily driver, ask why — there should be a specific reason related to the severity of the defects or the characteristics of the paint.
Compounds vs Polishes
This is where terminology gets confusing because manufacturers aren't consistent. Generally:
- Compounds are more aggressive. They contain larger or harder abrasive particles that cut faster and remove more material. They leave a haze or micro-marring that needs to be refined.
- Polishes are finer. They remove less material and leave a higher-gloss finish. A finishing polish should leave paint ready for wax, sealant, or ceramic coating with no haze.
- All-in-ones combine cutting ability with finishing ability. They're what you'd use in a one-step correction. They compromise — less cut than a dedicated compound, less refinement than a dedicated finishing polish — but the convenience factor is real.
Modern diminishing abrasive technology means many compounds break down during use, starting aggressive and finishing finer as you work them. This has blurred the line between compounds and polishes significantly, and it's one reason a skilled detailer can get excellent results from a single step that would have required two steps a decade ago.
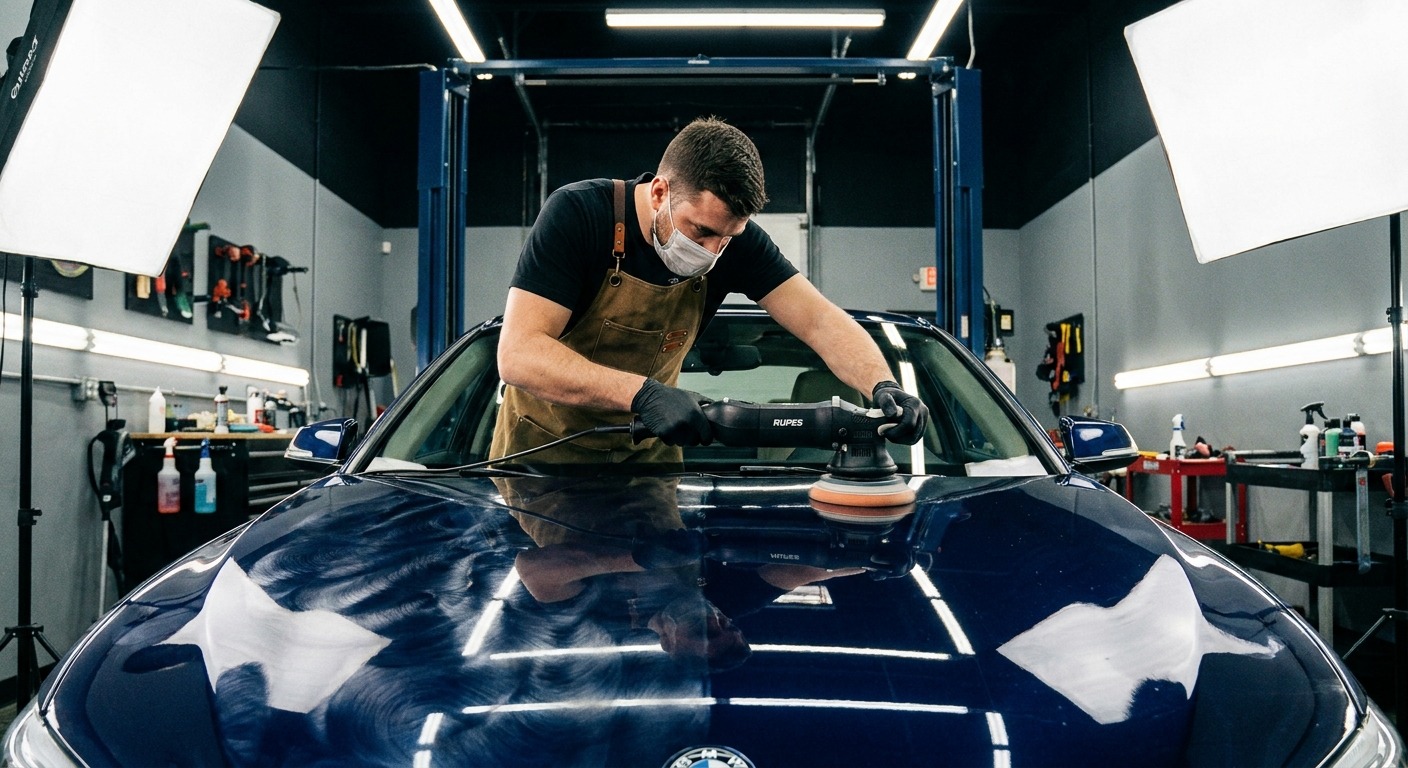
Machine vs Hand
Let's be direct: you cannot meaningfully correct paint by hand. Hand polishing with a compound or polish will improve gloss slightly and might reduce the appearance of very fine swirl marks, but it cannot generate the consistent speed and pressure needed to actually level clear coat defects. Anyone telling you otherwise is selling something.
A dual-action polisher is the minimum tool for real correction. Dual-action machines are forgiving — the oscillating motion makes it very difficult to burn through paint, even for beginners. Rotary polishers are more aggressive and efficient but require experience and a lighter touch. Our polisher comparison guide covers the differences in detail.
When You Need Correction (And When You Don't)
You need paint correction if your paint has visible defects under direct light — swirl marks that show as a spiderweb pattern under sunlight, scratches you can feel with a fingernail, water spot etching that didn't come out with a dedicated water spot remover, or oxidation that makes the paint look dull and chalky.
You don't need correction if your paint is in good shape and you're maintaining it properly. A vehicle that gets washed correctly, dried with proper towels, and protected with wax, sealant, or coating doesn't accumulate defects quickly. Prevention is always cheaper than correction.
You also don't need correction if you're about to sell a vehicle and aren't getting your money back. Be honest about the math. A professional two-step correction costs $400 to $800 or more in Canada. If that doesn't meaningfully change your sale price, skip it.
Cost Expectations in Canada
Professional paint correction pricing varies by region, vehicle size, and severity of defects. As a rough guide for a mid-size sedan in 2024:
- One-step polish: $200 to $400
- Two-step correction: $400 to $800
- Three-step correction: $700 to $1,200+
These prices usually don't include protection after the correction. Add $50 to $150 for a sealant or wax application, or $500+ if you're adding a ceramic coating on top. Some shops bundle correction with coating installation at a package price.
If you're doing it yourself, the initial investment in a polisher, pads, and compounds runs $200 to $400 for a solid beginner setup. After that, pads and product are your only recurring costs. The time investment is real, though — a proper two-step on a sedan takes a full day when you're learning.
Pro tip: Before your first real correction, practice on a junkyard panel or an inconspicuous area of your vehicle. Learning pad pressure, arm speed, and product working time on a test panel is much better than learning it on your hood.
After Correction: Protect What You've Done
Corrected paint that isn't protected will look great for about two weeks before it starts collecting new defects. The whole point of correction is to create a clean canvas for protection. Whether that's a carnauba wax, a synthetic sealant, or a ceramic coating depends on your budget and how much maintenance you want to do.
A ceramic coating is the longest-lasting option and makes ongoing maintenance significantly easier — which is why many detailers recommend it after a thorough correction. But a quality sealant reapplied every three to six months is a perfectly valid approach that costs far less upfront.
Whatever you choose, pair it with a proper wash method and you'll keep that corrected paint looking sharp far longer than you would otherwise. The correction gives you the finish. The protection and wash technique keep it.